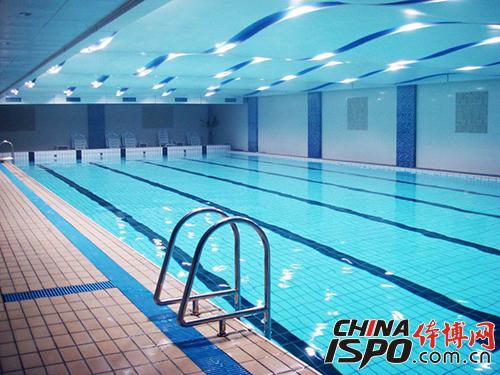
Swimming pools have become increasingly popular, and the tiling process for pool surfaces should begin with a clear understanding of the pool’s structure. This process involves six key steps to ensure precision and durability.

First, it's essential to determine the exact dimensions of the pool. For a 50-meter-long pool, the size must meet standard specifications with a slight positive tolerance. A competition-standard pool is typically 50 meters by 25 meters or 50 meters by 21 meters. The walls at both ends should extend from 30 cm above the water surface down to 80 cm below. The length error should be within +0.01 meters. After installing an automatic timing touch panel, the total length should not exceed 50 meters plus 0.03 meters. When calculating the renovation allowance, consider the thickness of ceramic tiles (0.8 cm), tile adhesive (0.7–0.8 cm), leveling waterproof mortar (2.5–3.0 cm), two layers of waterproof coating (0.2 cm each), and the electronic contact plate (1.0 cm each). Adding these up gives the necessary allowance. A pool without a touch panel will have a total length of approximately 50 (or 25) meters plus 0.11 meters, while one with a touch panel may be about 50 (or 25) meters plus 0.13 meters. The side walls can have a ±2 cm error in distance.
Second, an effective waterproofing method is crucial. During concrete pouring, high-strength impermeable concrete should be used and properly compacted. Once the formwork is removed, the curing period must be completed, followed by a water test to check for leaks. For internal wall waterproofing, cement-based crystalline materials are recommended, as they help bond the tile to the cement mortar. All adhesives, grouts, and sealants should also be waterproof-rated.
Third, leveling the pool walls is essential. After the 50-meter (or 25-meter) length is leveled, the actual size should be 50 meters (or 25 meters) plus 0.01 meters, plus 0.01 meters on each end for the contact plate, 8 mm for the tile thickness, and 7–8 mm for the adhesive. This results in a total of 50 meters (or 25 meters) plus 0.06 meters. Without a touch panel, the length should be around 50 meters (or 25 meters) plus 0.04 meters. The walls must be parallel and perpendicular, with the bottom walls meeting at right angles. The plane error should not exceed ±2 mm per square meter, and the side-to-side distance error should be within ±2 cm. The pool depth should align with the tile module based on its intended use.
Fourth, setting the benchmark and positioning lines is critical. The inner walls should be leveled and allowed to cure for a week. During this time, the surface should remain clean. Before laying tiles, establish a baseline: start with the overall shape of the pool, then center the wall of a 25-meter pool. Mark 2.5 meters (or 20 bricks) on each side. The water level elevation refers to the pool edge and overflow ditch. Place ash cakes every 2–3 meters along the rake line. The horizontal elevation of the pool edge and the 50-meter sides should be accurate within ±2 mm. The 50-meter wall is divided into 1-meter grids, which are further split into 125mm x 250mm sections. Any accumulated errors should be adjusted, and all baselines must be verified.
Fifth, the tiling order starts at one end of the pool and moves across the bottom to the other. Lane marking lines are laid out according to competition standards, and tiles are placed in sequence. For Rosa pool tiles measuring 244 x 119 mm with a 6 mm joint, there are 4 tiles per square meter in length and 8 in width, totaling 32 tiles. Check X and Y-axis grid lines every 2–3 meters to avoid cumulative errors.
In a standard competition pool, the tiles below the waterline and those above should be non-slip wool bricks, including lane marking tiles. The final dimensions at both ends must be 50 meters ± 0.02 to 0.03 meters.
Sixth, the correct mixing and application of the adhesive is important. The surface must be clean, free of dust and oil. Apply the adhesive evenly using a 10mm notch trowel, ensuring a thickness of 7–8 mm. Wait 15 minutes before placing the tiles. Do not spread adhesive over a large area in advance, nor lay tiles before the adhesive is fully bonded. When tiling, check that the extruded tiles are within ±2 mm of the desired size. Ensure evenness by leveling the tiles with a rubber float.
At both ends of the pool, anti-slip tiles should be installed from 300 mm above the water surface to 800 mm below. The distance between the finished surfaces must meet competition rules, with a length error of 50 meters ± 0.01 to 0.03 meters. On the sides of the pool, non-slip pit pattern bricks should be applied according to the detailed layout. Both sides and ends must maintain a level error of no more than ±2 mm, especially in counter-current pools.
Tiles must be set for at least two days. Sealant should be applied conventionally, and joints should be compacted with a special tool. Any excess adhesive or sealant on the tile surface should be wiped off immediately with a damp cloth.
After one week of installation, the pool can be safely used.
Rooftop Turf,Artificial Turf On Roof,Green Fake Grass Rooftop,Artificial Roof Grass
Changshu Keyuan Eco-friendly New Materials Co.,Ltd , https://www.ailiqingky.com